


Hand application remains the go-to method for filling or skimming walls and ceilings when you want full control over the work. It suits small areas as well as one-off repair, skimming and finishing jobs. It takes more time and effort than machine spraying, but it lets you adjust the amount of material precisely to the condition of the substrate. For a professional result, choose the right filler and follow a few basic rules.
Our hand-applied plasters and fillers




When to choose hand application
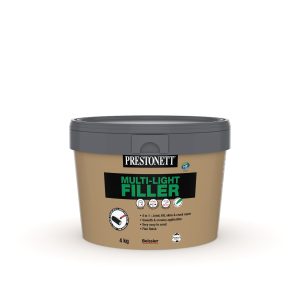
Applying by hand means laying on and smoothing the filler with a filling knife or a blade. This traditional approach is particularly recommended for small areas and localised defects, for filling a crack or for skimming a wall before painting. It also suits multipurpose fillers, which fill, level and skim with a single product: ideal for renovating a whole room without a stack of different products. Two of them are on this page: PRESTONETT MULTIPURPOSE FILLER, a powder, and PRESTONETT MULTI-LIGHT FILLER, ready mixed.
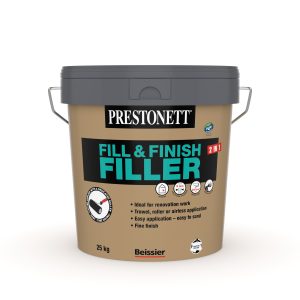
Powder fillers are widely used for repairs and levelling. They are mixed with water on site at the ratio given on the data sheet: 0.50 litres of water per kg of powder for PRESTONETT INTERIOR FILLER, PRESTONETT MULTIPURPOSE FILLER and PRESTONETT WOOD REPAIR, 0.45 litres for PRESTONETT EXTERIOR QUICK DRY FILLER and 0.25 litres for PRESTONETT WATERPROOF MASONRY FILLER. Ready mixed fillers, used straight from the pack, glide on smoothly, are lump-free and leave you time to work: the ready mixed Prestonett fillers on this page all have an unlimited working time. They are popular for finishing work and for levelling uneven substrates; PRESTONETT Fill & Finish Filler, for example, levels uneven surfaces up to 5 mm.
Choosing the right filler
A good hand-applied filler must bond well to a wide range of substrates (concrete, plaster, blockwork, old paintwork) and sand easily. Each data sheet lists the substrates a product accepts: most of the range covers concrete, plaster and old painted substrates, while PRESTONETT WOODFILLER (TUBE), PRESTONETT WOOD FILLER and PRESTONETT WOOD REPAIR are formulated for wood, and the jointing and finishing compounds BAGAR AIRLISS J and BAGAR AIRLISS J LIGHT are for plasterboard only. In practice, hand application suits virtually every type of filling and skimming work.
PRESTONETT MULTIPURPOSE FILLER, for example, fills up to 5 cm in one application and is also used for levelling and finishing surfaces, which simplifies the job. On walls in good condition, a fine finishing filler such as PRESTONETT FINE SURFACE FILLER, applied by hand at 1 mm, is enough to hide small defects.
When the job has to move quickly, a quick-drying filler cuts the wait between stages: PRESTONETT QUICK DRY FILLER can be overcoated after 15 minutes, depending on the substrate and atmospheric conditions, and PRESTONETT EXTERIOR QUICK DRY FILLER after approximately 3 hours (at 20°C and 55% RH, for a 4 cm thickness).
How to apply a filler by hand
Start by preparing the substrate: it must be clean, dry and free from dust and grease. On friable backgrounds such as old plaster or cellular concrete blocks, a stabilising primer is recommended to ensure adhesion. Then mask off the areas that are not to be filled with suitable tape and prepare your filler as stated on its data sheet, respecting the mixing ratio for powders.
For filling, load your filling knife and work the filler into the hole or crack with criss-cross strokes; a stainless steel blade can also be used. With some products, a roller lets you spread and lay on the material quickly: PRESTONETT MULTI-LIGHT FILLER, PRESTONETT Fill & Finish Filler, BAGAR AIRLISS G, BAGAR AIRLISS J and BAGAR AIRLISS J LIGHT list a dedicated roller in their equipment. Then smooth the filler off by hand with a blade for an even first coat.
Finishing tips and tool care
Whatever the technique, allow the full drying time between coats to avoid cracking. Most of the range sands easily; choose a suitable abrasive (180 to 320 grit, depending on the finish required). A light sanding followed by dusting off leaves the surface ready for painting. Clean your tools after each use, especially with a powder filler, which stays workable for only about 30 to 60 minutes once mixed (at 20°C, depending on the product): a spatula, trowel or filling knife caked with dried filler can spoil the finish. The data sheets give the same instruction for every product: clean with water before it is completely dry.
Hand application takes some practice and patience, but by combining good technique with quality fillers, you will get perfectly smooth walls and ceilings, ready for decoration.